The Hub
Hub
For all things candle and home fragrance making!
A Guide To Making Bath Bombs
What is a Bath Bomb?
A bath bomb is a small, typically spherical, or moulded object that dissolves in water, releasing various ingredients such as fragrances, colourants, moisturisers, and sometimes bubbles.
Bath bombs are designed to enhance the bathing experience, making it more relaxing and enjoyable.The primary ingredients in a bath bomb typically include baking soda (sodium bicarbonate) and citric acid. When these two components come into contact with water, they react, creating effervescence and fizz in the bathwater. This reaction is what gives bath bombs their characteristic fizzing sensation when they are dropped into a bath.
In addition to the basic ingredients, bath bombs can contain various additives like essential oils, Epsom salts, fragrance oils, and natural colouring agents. These additives are responsible for the pleasant scents and colours that are released into the bathwater, creating a soothing and aromatic bathing experience. Some bath bombs are also formulated with moisturising ingredients like shea butter or cocoa butter to help nourish and soften the skin.
Bath bombs come in a wide variety of scents, colours, and shapes, making them a popular choice for personal relaxation and self-care. They are often used to create a spa-like atmosphere at home and can be a fun and luxurious addition to a bath.
Bath Bomb Ingredients
- Sodium Bicarbonate
- Citric Acid
- Fragrance Oils
- Water-Based Colours
- Bath Bomb Moulds
- Large Mixing Bowl
What Can I Use as a Bath Bomb Mould?
You can use a variety of household items such as bath bomb moulds if you're making bath bombs at home. Here are some common alternatives to traditional bath bomb moulds:
Ice Cube Trays: Ice cube trays come in various shapes and sizes, making them an excellent choice for creating unique bath bomb shapes. Silicone ice cube trays are particularly useful as they make it easy to remove the bath bombs once they've set.
Cookie Cutters: Metal or plastic cookie cutters can be used to shape bath bombs. Simply pack the bath bomb mixture into the cutter, then carefully remove it.
Silicone Moulds: Silicone moulds come in a wide range of shapes and sizes, and they are perfect for bath bomb making. Look for silicone moulds designed for soap-making or other crafts. You can press the bath bomb mixture into these moulds, and they are flexible, making it easy to release the bath bombs when they are dry.
Muffin Tins: Mini muffin tins can be used to create small, round bath bombs. Press the bath bomb mixture into the compartments and allow it to set.
Plastic Easter Eggs: Plastic Easter egg halves can be used as moulds for larger, egg-shaped bath bombs. Simply fill one half with the bath bomb mixture, press the two halves together, and let it set. Remember to grease or line your improvised moulds to help release the bath bombs more easily. Experiment with different shapes and sizes to create unique bath bombs that suit your preferences.
Making Bath Bombs
- Mixing
Mix 2 parts of sodium bicarbonate to 1 part citric acid in a large mixing bowl. It’s good practice to set aside some extra in a separate bowl in case you add too much water.
-
Adding colour and fragrance to your mixture
In a separate bowl, mix your liquids. We recommend no more than 20ml per 1KG of a mixture of fragrance oil, a few drops of colour will be enough to begin within a separate bowl, mix your liquids. We recommend no more than 20ml per 1KG of mixture of fragrance oil, a few drops of colour will be enough to begin with. Make sure there isn’t too much liquid, or your dry mixture will just fizz.. Make sure there isn’t too much liquid, or your dry mixture will just fizz. Once thoroughly mixed, slowly add your water-based, and be careful not to add too much so your mixture doesn’t get too wet, please note it is difficult to get deep colours such as purple or pink, so try not to overdo it. Your colour will foam a little and “ball up” when you try to blend it in, we recommend squashing the little balls against the side of the bowl with the back of a spoon and continuing mixing to evenly distribute the colour.
- Prepare for packing into moulds
Your mixture should still be powdery when you move it about with your hand or spoon, but when you grab a handful and squeeze it should stay packed together. A good test of this is to drop your lump of squeezed mix into your bowl. If it breaks apart completely it needs more liquid, either water-based colour or water if the mixture is too soggy, add more bicarb and citric to dry it out.
- Moulding
Once you are happy with the bath bomb mixture consistency, spoon the mixture into the moulds and pack tightly until both cavities are overfilled. Carefully push the two halves together and squeeze firmly. Remove the top half - place a sheet of cellophane in your palm and turn the unmoulded half onto your palm. You should then be able to easily remove the other half of the mould. Place the bomb gently on a clean dry surface, and leave to dry overnight. Your bath bombs are now ready to use! Repeat the process with different colours, and fragrances or try layering your different coloured mixtures for a great-looking bath bomb. Try adding vegetable oils & butter for moisturising, SLS for extra bubbles, dried rose petals or even glitters to really enhance the look and performance your bath bombs.
.jpg)
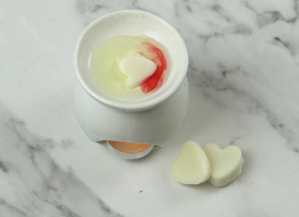
The finished result
You should now have a variety of bath bombs ready to pop in the bath! Well done and enjoy!

What are the Benefits of Including Citric Acid?
Including citric acid in bath bombs offers several benefits:
Fizz and Effervescence: Citric acid is a key ingredient in bath bombs because it reacts with baking soda (sodium bicarbonate) when it comes into contact with water. This chemical reaction generates carbon dioxide gas, resulting in effervescence and fizzing in the bathwater. This fizzing action can create an enjoyable and visually appealing experience when using the bath bomb.
Aromatherapy: Citric acid can be used as a carrier for fragrances and essential oils in bath bombs. When the bath bomb dissolves, it releases the scents, creating a pleasant and aromatic atmosphere in your bath. This can enhance relaxation and provide a soothing sensory experience.
Skin Softening: Citric acid can help soften and exfoliate the skin. When dissolved in the bathwater, it can contribute to the removal of dead skin cells, leaving your skin feeling smoother and rejuvenated.
pH Balancing: Citric acid can help balance the pH of bathwater. This is particularly useful for individuals with hard water, as it can neutralise some of the minerals in the water, making it softer and more skin-friendly.
Skin Brightening: Citric acid is a natural alpha hydroxy acid (AHA) and is often used in skincare for its potential to brighten and rejuvenate the skin. In a bath bomb, it can help with mild exfoliation, potentially leaving your skin looking fresher and more radiant.
Enhanced Cleaning: The effervescence created by citric acid and baking soda can help dislodge dirt and grime from your skin, providing a mild cleansing effect during your bath. It's important to note that while citric acid can offer these benefits, it should be used in moderation to avoid skin irritation, especially if you have sensitive skin.
The formulation of bath bombs should strike a balance between citric acid and other ingredients to ensure a safe and enjoyable bathing experience. If you have known skin sensitivities or allergies, it's a good idea to test a small amount of the bath bomb on a small area of your skin before using it in your bath.
How to Wrap Bath Bombs
Wrapping bath bombs is a great way to protect them, preserve their freshness, and make them visually appealing if you're giving them as gifts or selling them. Here's how you can wrap bath bombs:
Materials You'll Need: Your Bath bombs, Clear plastic wrap or shrink wrap, Cellophane bags or organza bags (optional), Ribbon or twine (optional), Labels or tags (optional).
Steps to Wrap Bath Bombs:
Prepare the Bath Bombs: Make sure your bath bombs are completely dry and free of any excess moisture. If you've made them yourself, allow them to set and dry thoroughly.
Cut the Wrap: Cut a piece of clear plastic wrap or shrink wrap that is large enough to comfortably wrap the bath bomb while leaving a bit of extra material for twisting or tying at the top. If you're using cellophane bags or organza bags, you can skip this step.
Place the Bath Bomb: Set the bath bomb in the centre of the plastic wrap, or if you're using a bag, simply place it inside the bag.
Gather the Material: Carefully lift the sides of the plastic wrap or bag up and around the bath bomb, creating a pouch or bag shape. Make sure the bath bomb is securely enclosed.
Twist or Tie the Top: Twist the excess plastic wrap at the top of the bath bomb to seal it. If you're using a bag, you can tie it closed with a ribbon or twine. This not only secures the bath bomb but also adds a decorative touch.
Add a Label or Tag (Optional): To personalise your bath bombs or provide information about them, you can attach a label or tag to the twist-tied or knotted portion. This can include the bath bomb's name, scent, ingredients, or any special instructions.
Trim Excess Material (Optional): If there's a lot of excess plastic wrap or bag material at the top, you can trim it for a neater appearance.
Finishing Touches (Optional): To make your wrapped bath bombs even more visually appealing, you can add additional decorations, like decorative stickers, bows, or small ornaments to the outside of the wrapping.
By following these steps, you can effectively wrap bath bombs, whether for your own use or to give as gifts. The choice of wrapping material and decorative elements can be customised to suit your personal style or the occasion
Do Bath Bombs Expire?
Bath bombs can have a shelf life, but their longevity depends on several factors, including the ingredients used and how they are stored. In general, bath bombs can last for about 6 months to 1 year, but they may still be safe and effective for use after that time if stored properly. Here are some considerations:
Ingredients: The shelf life of a bath bomb depends on the quality of the ingredients used. If high-quality, fresh ingredients are used, the bath bomb is likely to have a longer shelf life. Lower-quality or older ingredients may result in a shorter shelf life.
Moisture and Humidity: Bath bombs are sensitive to moisture and humidity. They can become less effective or start fizzing prematurely if exposed to moisture. It's essential to store them in a dry place. Consider using airtight containers or resealable bags to protect them from moisture.
Fragrance and Scent: The scent of bath bombs can fade over time. Some fragrance oils and essential oils are more stable than others, so the scent may last longer in bath bombs containing these oils.
Colour: The colours in bath bombs may also fade over time when exposed to light and air. If you want to preserve the color, store bath bombs in a dark or opaque container.
Texture and Consistency: Older bath bombs might lose their fizz and texture, making them less enjoyable to use. However, they can still be safe and effective for use even if they don't fizz as vigorously as when they were freshly made.
Allergen Sensitivity: If you have known sensitivities or allergies to certain ingredients in bath bombs, it's a good idea to use them within their shelf life to avoid any potential skin reactions.
To extend the shelf life of your bath bombs, consider the following tips: Store them in a cool, dry place away from direct sunlight and moisture. Keep bath bombs in an airtight container or resealable bag. Label your bath bombs with the date they were made, so you can keep track of their age. If you notice any changes in colour, texture, scent, or quality, it's best to use the bath bomb sooner rather than later.
How to Use a Bath Bomb
Using a bath bomb is a simple and enjoyable process. Here's a step-by-step guide on how to use a bath bomb effectively:
What You'll Need: Bath bomb A clean, filled bathtub Warm water, Optional: A timer, a good book, or soothing music for relaxation
Steps to Use a Bath Bomb
Prepare the Bathtub: Start by ensuring that your bathtub is clean. Remove any debris or soap scum from the tub to make your bath experience more pleasant.
Fill the Bathtub: Fill the bathtub with warm water. The water temperature should be comfortable for you, but not too hot, as hot water can be drying to the skin.
Aromatherapy (Optional): If you'd like to enhance your aromatherapy experience, consider lighting some scented candles or incense, or playing soothing music in the background. This can create a more relaxing atmosphere.
Unwrap the Bath Bomb: If your bath bomb is wrapped in plastic or any packaging, unwrap it just before use. You want to keep it as dry as possible until you're ready to use it.
Lower the Bath Bomb: Gently lower the unwrapped bath bomb into the tub filled with warm water. You can do this by simply placing it on the surface of the water. As it begins to dissolve, you'll notice it starting to fizz and release its colours, scents, and other ingredients.
Enjoy the Show: As the bath bomb dissolves, watch the vibrant colours swirl and the aromatic scents fill the air. This can be a visually appealing and relaxing experience.
Relax in the Bath: Once the bath bomb has fully dissolved, step into the tub and enjoy your bath. Take your time to relax and unwind. You can read a book, listen to music, or just close your eyes and soak in the bath. The moisturising and aromatic properties of the bath bomb will add to your relaxation.
Rinse (Optional): After your bath, you can rinse your body with clean water to remove any residue or oils from the bath bomb. This step is optional and depends on personal preference.
Drain the Tub: Once you're done, drain the bathwater. Be sure to rinse the tub to remove any remaining bath bomb residue.
Clean the Tub: It's a good idea to rinse and clean the bathtub after using bath bombs to prevent any colour or residue buildup. Using a bath bomb can be a wonderful way to unwind and pamper yourself. The combination of warm water, aromas, and the soothing effects of the bath bomb can provide a relaxing and rejuvenating bathing experience.
FAQs
How long does it take to make a bath bomb?
In total, making a single bath bomb from start to finish might take anywhere from 20 minutes to an hour, including the time it takes for the bath bomb to dry. Keep in mind that as you become more experienced, the process will become more efficient, and you'll likely be able to make bath bombs more quickly. If you're making a batch of bath bombs, it will take proportionally longer based on the quantity you're producing.
How easy is it to make bath bombs?
Making bath bombs can be relatively easy, especially with the right ingredients, equipment, and a clear recipe to follow. Many people find it to be a fun and creative DIY project. However, like any craft, there can be a learning curve, and the ease of making bath bombs depends on your experience and comfort with the process. Overall, while making bath bombs can be a fun and satisfying DIY project, it may take a little practice to get the hang of it. Don't be discouraged if your first attempts are less than perfect; many people improve with experience. The key is to start with a straightforward recipe, gather your materials and equipment, and take your time to follow the instructions carefully. With patience and practice, you can create your own custom bath bombs for personal use or as gifts for friends and family.
How are lush bath bombs made?
Lush, a popular cosmetics and bath product company, is known for its unique and colourful bath bombs. While the exact formulation and manufacturing process are closely guarded trade secrets, some general insights into how Lush bath bombs are made can be provided based on industry knowledge and public information:
Ingredients and Components:
Base Ingredients: Lush bath bombs typically contain a combination of key dry ingredients, including baking soda (sodium bicarbonate) and citric acid. These ingredients react when they come into contact with water, creating the fizzing effect that bath bombs are known for.
Oils: Lush uses various moisturising oils like cocoa butter, shea butter, and other essential oils to add fragrance and nourish the skin.
Fragrances and Colours: Lush products are known for their fragrances and vibrant colors. Essential oils, fragrance oils, and natural colorants are used to achieve these characteristics.
Extras: Some bath bombs may also contain additional components such as flower petals, glitter, or other decorative elements.
The Manufacturing Process:
The exact manufacturing process at Lush is a proprietary trade secret, but here is a simplified overview of the steps involved in making bath bombs, which may be similar to their process:
Mixing Dry Ingredients: Baking soda and citric acid are mixed in precise proportions. These are the primary ingredients responsible for the fizzing action.
Adding Oils and Fragrances: Moisturising oils and fragrances are carefully blended into the dry mixture. Essential oils and other natural or synthetic fragrances are chosen to give the bath bombs their unique scents.
Incorporating Colorants: Natural or synthetic colorants are added to the mixture to achieve the desired colours. Lush is known for its vivid and vibrant bath bombs.
Moulding the Bath Bombs: The mixture is then pressed into moulds to create the distinctive shapes of Lush bath bombs. These moulds can be simple spheres or more intricate shapes.
Drying and Setting: The bath bombs are allowed to set and dry. This can take several hours to a couple of days, depending on the specific recipe and environmental conditions.
Quality Control: Each bath bomb undergoes quality control checks to ensure it meets Lush's high standards for appearance, scent, and performance.
Packaging: Once the bath bombs have set and passed quality control, they are carefully packaged in Lush's distinctive and eco-friendly packaging.
It's important to note that Lush bath bombs are made with an emphasis on using natural and ethically sourced ingredients, as well as environmentally friendly packaging. The company is also known for its stance against animal testing. While this information provides a general idea of how bath bombs are made, the specific details of Lush's process and formulations remain a closely guarded secret.
Feel free to leave a comment or question below with your experiences in achieving the perfect bath bomb.
View our full range of bath bomb products here!




.jpg)
